
16 KiB
| lang | layout | section | category | title | description | tabs | |||||||||
|---|---|---|---|---|---|---|---|---|---|---|---|---|---|---|---|
| de-DE | wiki | ds-index | guides | DS Game Forwarders | How to use DS game forwarders on hiyaCFW or 3DS HOME menu |
|
Forwarders are shortcuts for games that you can install to your HOME menu, hiyaCFW menu, or flashcard menu. You can load DS(i) games from the SD card (using nds-bootstrap) or from a compatible flashcard (via its respective kernel) using forwarders installed to your menu of choice.
DS games need to be dumped to a digital .nds format. You can dump your DS cartridges using GodMode9 on 3DS, or GodMode9i on DSi.
{:.alert .alert-info}
If you have any issues, check the FAQs on the GBAtemp thread. {:.alert .alert-warning}
Choose one of the following to add to the HOME menu:
{% capture tab-3ds-sd-card %}
This page assumes you are running a modern CFW environment from 3ds.hacks.guide. {:.alert .alert-warning}
Part 1: Getting the required files
If you already have Universal Updater installed on your console, you can skip to step 3. {:.alert .alert-info}
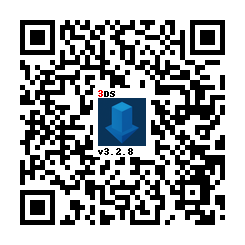
- Öffne FBI und wähle
Remote-Installation, dannQR-Code scannen - Scannen Sie diesen QR-Code, um die neueste Version von Universal-Updater zu installieren
- Open Universal Updater from your HOME Menu
- Install the NDSForwarder package
- NDSForwarder and its required files are now set up in its respective locations
Part 2: NDSForwarder
- Open the Homebrew Launcher
- In the Homebrew Launcher, open
NDS Forwarder Generator - Navigate to your game's location and press A
- Confirm you wish to install by selecting
Yes - After it is installed, your game will now appear as a title on your HOME menu
- If launching the title brings up an error message saying
/_nds/ntr-forwarder/sdcard.nds not found, follow steps 2-3 in Part 1 of theDSi SD cardtab
- If launching the title brings up an error message saying
Teil 3: Abrufen des AP-Fix-Pakets aus TWiLight Menu++
Wenn Sie TWiLight Menu++ bereits installiert haben, sind Sie mit dieser Anleitung fertig. {:.alert .alert-info}
- Lade die neueste Version von
TWiLightMenu-3DS.7z herunter - Gehen Sie in der
.7z-Dateiin den Ordner_nds/TWiLightMenu/extras - Ziehen Sie die Datei
apfix.pcknachsd:/_nds/ntr-forwarder/
{% endcapture %} {% assign tab-3ds-sd-card = tab-3ds-sd-card | split: "////////" %}
{% capture tab-dsi-sd-card %}
Anforderungen
- Ein Nintendo DSi mit Unlaunch und hiyaCFW installiert
- Die neueste Version von NDSForwarder-DSi
Teil 1: Erste Schritte
- Kopieren Sie
NDSForwarder.dsiin das Stammverzeichnis Ihrer SD-Karte- Diese kann optional mit NTM direkt auf hiyaCFW installiert werden
- Das Forwarder-Paket herunterladen
- Entpacken Sie den Inhalt des
Stammordners für die SD-Kartein den Stammordner der SD-Karte Ihres DSi
Teil 2: Abrufen des AP-Fix-Pakets aus TWiLight Menu++
Wenn Sie TWiLight Menu++ bereits installiert haben, fahren Sie mit dem nächsten Teil fort. {:.alert .alert-info}
- Lade die neueste Version von
TWiLightMenu-DSiherunter - Gehen Sie in der
.7z-Dateiin den Ordner_nds/TWiLightMenu/extras - Ziehen Sie die Datei
apfix.pcknachsd:/_nds/ntr-forwarder/
Teil 3: NDSForwarder-DSi
- Setzen Sie Ihre SD-Karte wieder in Ihr Gerät ein
- Halten Sie A + B gedrückt und schalten Sie Ihr Gerät ein, um zu Unlaunch zu starten
NDSForwarder.dsistarten- Wenn Sie eine
Fehlermeldung von nitroFSInit()erhalten, versuchen Sie, TWiLight Menu++ zum Starten zu verwenden, oder legen SieNDSForwarder.dsiim Stammverzeichnis Ihrer SD-Karte ab
- Wenn Sie eine
- Drücken Sie A bei
Installieren - Navigieren Sie zum Ort Ihres Spiels und drücken Sie A
- Nach der Installation erscheint dein Spiel als Titel auf deinem hiyaCFW DSi Menü
{% endcapture %} {% assign tab-dsi-sd-card = tab-dsi-sd-card | split: "////////" %}
{% capture tab-flashcard %}
Anforderungen
- Ein Nintendo DS, DS Lite, DSi oder 3DS mit einer Flashcard
- Die neueste Version von NDSForwarder-DSi
Teil 1: Erste Schritte
- Kopieren Sie
NDSForwarder.ndsin das Stammverzeichnis Ihrer SD-Karte - Das Forwarder-Paket herunterladen
- Extrahieren Sie den Inhalt des
Stammordners für die SD-Kartein den Stammordner der SD-Karte Ihrer Flash-Karte
Teil 2: Abrufen des AP-Fix-Pakets aus TWiLight Menu++
Wenn Sie TWiLight Menu++ bereits installiert haben oder nur DSiWare verwenden möchten, fahren Sie mit dem nächsten Teil fort. {:.alert .alert-info}
- Lade die neueste Version von
TWiLightMenu-Flashcard.7zherunter - Gehen Sie in der
.7z-Dateiin den Ordner_nds/TWiLightMenu/extras - Ziehen Sie die Datei
apfix.pcknachsd:/_nds/ntr-forwarder/
Teil 3: NDSForwarder-DSi
- Stecken Sie die SD-Karte wieder in die Speicherkarte und die Speicherkarte in Ihr Gerät
- Schalten Sie Ihr Gerät ein und starten Sie Ihre Flashcard
NDSForwarder.ndsstarten- Wenn Sie eine
Fehlermeldung von nitroFSInit()erhalten, versuchen Sie TWiLight Menu++ zum Starten zu verwenden, oder legen SieNDSForwarder.ndsim Stammverzeichnis Ihrer SD-Karte ab
- Wenn Sie eine
- Drücken Sie A bei
Installieren - Navigieren Sie zum Ort Ihres Spiels und drücken Sie A
- Nach der Installation erscheint Ihr Spiel in einem Ordner namens
forwardersauf dem SD-Kartenstamm der Flashkarte
{% endcapture %} {% assign tab-flashcard = tab-flashcard | split: "////////" %}
{% capture tab-flashcard-dsi-3ds %}
Anforderungen
- DSi-Benutzer:
- Ein Nintendo DSi mit Unlaunch und hiyaCFW installiert
- Die neueste Version von Title Manager für Hiya
- 3DS-Benutzer:
- A Nintendo 3DS family console with modern CFW environment from 3ds.hacks.guide
{% capture flashcards %} The recommended flashcards are the DSTT and Acekard 2i. If you want perfect game compatibility, get the SuperCard DSTWO/DSTWO PLUS. The only downside is that it drains your system battery faster.
If you have a flashcard that works with Apache Thunder's NTR Launcher, you can request it on the GBAtemp thread. Be sure to specify which build you're using (Normal or Alt), and if RESETSLOT1 is set to 0 or 1 in sd:/nds/ntr_launcher.ini.
Compatible:
- Acekard 2(i) (DSi-Enhanced games, including newer NTR games, don't work)
- Acekard RPG
- DSTT
- DSTT Advance
- Galaxy Eagle
- M3 DS Real
- M3 DS Simply (uses < 2 GB microSD card)
- R4 DS (Original Non-SDHC version, uses < 2 GB microSD card)
- R4 SDHC Snoopy
- R4 SDHC RTS LITE (www.r4isdhc.com)
- R4 SDHC Upgrade (www.r4i-sdhc.com)
- R4i3D (www.r4i3d.com)
- R4iDSN
- R4i Gold
- R4i Gold RTS (www.r4ids.cn)
- R4i-SDHC (www.r4i-sdhc.com) (Normal and RTS versions)
- R4iTT (www.r4itt.net) (Purple card may be incompatible)
- SuperCard DSONE
- SuperCard DSTWO (Normal and Plus versions)


Untested:
- R4i3D NEW (Use R4iDSN template and pack)
Partially compatible:
- Ace 3DS+ (Game compatibility is bad, so saving/loading save file results in crashing)
- Gateway Blue Card (Game compatibility is bad, so saving/loading save file results in crashing)
- EX4DS (Game compatibility is bad, so saving/loading save file results in crashing)
- R4iLS (Game compatibility is bad, so saving/loading save file results in crashing)
- Cards with www.r4isdhc.com.cn (Game compatibility is bad, so saving/loading save file results in crashing)
Incompatible:
- CycloDS (i)Evolution (Can autoboot ROMs, but it works differently than other flashcards)
- (i)Edge (Unable to autoboot a .nds ROM)
- R4 Gold Pro (www.r4i-gold.com / www.r4i-gold.me) (YSMenu (not the forwarder process) bricks the card)
- R4i3D (2012)
- R4 Infinity Dual Core
- R4 SDHC
- R4 SDHC Dual-Core (www.r4isdhc.com) (YSMenu (not the forwarder process) bricks the card) {% endcapture %}
A supported flashcard from this list
- A 64 bit OS
- Forwarder3-DS
- Java 8
- Linux users: JavaFX
- Debian-based: Run this script
- Arch:
sudo pacman -S java8-openjfx && sudo archlinux-java set java-8-openjdk/jre
Teil 1: Erste Schritte
- Download one of these packs:
- Extract the contents of the
for Slot-1 microSDfolder to the root of your flashcard's microSD card, and (if the folder exists) the contents of thefor 3DS SD cardfolder to the root of your 3DS's SD card- What will be in each pack for loading ROMs:
- Original R4/M3 Simply - WoodR4 & YSMenu
- DSTT/R4i Gold/R4i-SDHC/R4 SDHC Dual-Core/R4 SDHC Upgrade/SC DSONE, Acekard 2(i)/M3DS Real/R4i-SDHC 1.4.x - YSMenu
- Acekard RPG, Ace 3DS+/Gateway Blue Card/R4iLS/R4iTT, R4iDSN/R4i Gold RTS - WoodR4
- What will be in each pack for loading ROMs:
After you extract the pack for your card, you can edit sd:/_nds/ntr_forwarder.ini to change the following settings. This isn't possible for Acekard RPG, R4 DS, and R4i Gold RTS.
NTRCLOCK: If set to0or A is held, the DSi boot screen will appear instead of the normal DS splash, and TWL clock speed is used, so lags begoneDISABLEANIMATION: If set to1or B is held, the DS/DSi boot screen is skippedHEALTHSAFETYMSG: If set to1, the boot screen's health and safety message will appear on the bottom screen, otherwise the bottom screen stays white with no health and safety message
Part 2: Getting the AP fix files from TWiLight Menu++
If you already have TWiLight Menu++, skip to the next part. {:.alert .alert-info}
- Lade die neueste Version von
TWiLightMenu-3DS.7z herunter - In the 7z file, go to the
_nds/TWiLightMenu/extrasfolder - Drag the
apfix.pckfile tofat:/_nds/ntr-forwarder/
Part 3: Forwarder3-DS
- Open
Forwarder3DS.jar- Windows users: If it doesn't open, download this Forwarder3DS.bat, place it in the same folder as Forwarder3DS.jar, and run it
- Set your card as the
Targeton the left- NOTE: If you don't see a list of cards, download this zip, and put the
forwardersfolder in the same folder as Forwarder3DS.jar, then rename it to.forwarders
- NOTE: If you don't see a list of cards, download this zip, and put the
- Enable
Automatically set ROM path- Linux users: The automatic path is incorrect since it includes the entire path (e.g.
/media/$USER/something/), please remove that part - MacOS users: The automatic path is incorrect since it includes
/Volumes/(cardname)/at the start, please remove that part
- Linux users: The automatic path is incorrect since it includes the entire path (e.g.
- Click the folder in the top right and select the ROMs you want to make forwarders for or drag and drop them onto the window
- NOTE: The ROMs must already be on your SD card when selecting them, and can't be moved without recreating the forwarders
- If you're playing a hack/translation of a DSi-Enhanced game that has it's banner/title edited, find the banner for the game from here, right click on the game in Forwarder3-DS, click
Import banner, and click on the banner to use - If using a homebrew ROM, click on it, then clear the
Game titleand type the game's title - Click the floppy disk button to generate the forwarders
Part 4: Installing the forwarder
- If using a 3DS family console:
- Copy the CIA(s) to your 3DS's SD card, then install them using FBI
- If using EmuNAND, install to both SysNAND and EmuNAND
- Copy the CIA(s) to your 3DS's SD card, then install them using FBI
- If using a DSi:
- Copy
tmfh.ndsfrom the TMFH.zipfile to the root of your SD card - Reinsert your SD card into your DSi
- Launch
tmfh.ndsfrom Unlaunch or TWiLight Menu++ - Install the forwarder NDS file using TMFH {% endcapture %} {% assign tab-flashcard-dsi-3ds = tab-flashcard-dsi-3ds | split: "////////" %}
- Copy
{% assign tabs = tab-3ds-sd-card | concat: tab-dsi-sd-card | concat: tab-flashcard | concat: tab-flashcard-dsi-3ds %} {% include tabs.html index=0 tabs=tabs %}