mirror of
https://github.com/rvtr/wiki.git
synced 2025-10-31 06:31:13 -04:00

100 lines
5.7 KiB
Markdown
100 lines
5.7 KiB
Markdown
---
|
||
lang: ko-KR
|
||
layout: wiki
|
||
section: twilightmenu
|
||
category: installing
|
||
title: 설치하기 (3DS)
|
||
long_title: TWiLight Menu++ 설치하기 (3DS)
|
||
description: 닌텐도 3DS에서 TWiLight Menu++를 설치하는 방법
|
||
tabs:
|
||
-
|
||
working-camera: 카메라를 사용하여 설치
|
||
non-working-camera: 카메라를 사용하지 않고 설치
|
||
manual: 수동
|
||
---
|
||
|
||
설치를 진행하기 전에, 사용자의 3DS 본체에 커스텀 펌웨어가 있어야 합니다. [3ds.hacks.guide](https://3ds.hacks.guide)를 따라서 설치해 주세요.
|
||
{:.alert .alert-info}
|
||
|
||
{% capture tab-working-camera %}
|
||
1. FBI를 열고 `Remote Install`에 진입합니다. 그러고 나서 `Scan QR Code`를 선택하세요
|
||
1. 아래의 QR 코드를 스캔해서 최신 버전의 [Universal-Updater](https://github.com/Universal-Team/Universal-Updater)를 설치하세요<br> 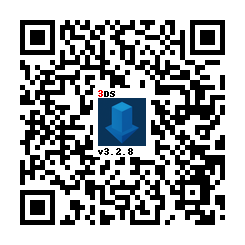
|
||
1. FBI를 닫고 Universal-Updater를 실행하세요
|
||
- 홈 메뉴에 표시되지 않는다면 3DS를 재부팅 하세요
|
||
1. TWiLight Menu++를 앱 그리드에서 찾으세요. 찾는 데 문제가 있는 경우 사이드바의 세 번째 탭으로 검색할 수 있습니다.
|
||
- TWiLight Menu++의 아이콘은 다음과 같습니다: 
|
||
1. 사이드바에서 <kbd class="face">A</kbd>를 누르거나 다운로드 아이콘을 터치한 후, `TWiLight Menu++`를 선택해서 설치를 진행하세요.
|
||
- 시간이 조금 걸릴 수 있습니다.
|
||
{% endcapture %}
|
||
{% assign tab-working-camera = tab-working-camera | split: "////////" %}
|
||
|
||
{% capture tab-non-working-camera %}
|
||
1. 최신 버전의 [`Universal-Updater.cia`](https://github.com/Universal-Team/Universal-Updater/releases/latest/download/Universal-Updater.cia)를 다운로드 하세요.
|
||
1. SD카드의 아무데나 `Universal-Updater.cia` 파일을 놓으세요.
|
||
1. 닌텐도 3DS에서 FBI를 실행하세요.
|
||
1. FBI에서 `Universal-Updater.cia`파일을 붙여넣은 폴더를 찾으세요.
|
||
1. `Universal-Updater.cia`파일을 선택해서 "Install & Delete"를 선택하세요.
|
||
1. FBI를 닫고 Universal-Updater를 실행하세요
|
||
- 홈 메뉴에 표시되지 않는다면 3DS를 재부팅 하세요
|
||
1. TWiLight Menu++를 앱 그리드에서 찾으세요. 찾는 데 문제가 있는 경우 사이드바의 세 번째 탭으로 검색할 수 있습니다.
|
||
- TWiLight Menu++의 아이콘은 다음과 같습니다: 
|
||
1. 사이드바에서 <kbd class="face">A</kbd>를 누르거나 다운로드 아이콘을 터치한 후, `TWiLight Menu++`를 선택해서 설치를 진행하세요.
|
||
- 시간이 조금 걸릴 수 있습니다.
|
||
{% endcapture %}
|
||
{% assign tab-non-working-camera = tab-non-working-camera | split: "////////" %}
|
||
|
||
{% capture tab-manual %}
|
||
|
||
If you use a Windows edition which contains Windows Defender, it'll detect the `.7z` file as a Trojan due to a false positive. To fix the false positive, ensure Windows Defender is up to date.
|
||
{:.alert .alert-warning}
|
||
|
||
1. 최신 버전의 [`TWiLightMenu-3DS.7z`](https://github.com/DS-Homebrew/TWiLightMenu/releases/latest/download/TWiLightMenu-3DS.7z)를 다운로드 하세요.
|
||
1. `TWiLightMenu-3DS.7z`를 압축 해제하세요
|
||
1. SD 카드 루트에 `_nds` 폴더를 복사하세요
|
||
1. SD 카드 루트에 `BOOT.NDS` 파일을 복사하세요
|
||
1. SD 카드 루트에 `roms` 폴더를 복사하세요
|
||
1. SD 카드 루트에 `.cia` 파일을 복사합니다.
|
||
1. 3DS 본체의 FBI에서 CIA 파일을 설치하세요
|
||
{% endcapture %}
|
||
{% assign tab-manual = tab-manual | split: "////////" %}
|
||
|
||
### 설치하기
|
||
|
||
{% assign tabs = tab-working-camera | concat: tab-non-working-camera | concat: tab-manual %}
|
||
{% include tabs.html index=0 tabs=tabs %}
|
||
|
||
### 플래시카드 데이터 사용
|
||
|
||
플래시카드는 게임 카드 슬롯에 넣는 것으로, 마이크로 SD 카드 슬롯이 포함되어 있습니다. 플래시카드가 없는 경우 이 가이드를 완료했다는 의미입니다.
|
||
{:.alert .alert-warning}
|
||
|
||
#### R4(i) Ultra를 사용하는 경우
|
||
|
||
1. Follow [this](installing-flashcard) guide starting from `To run games using your flashcard firmware`
|
||
- 경고는 무시해도 됩니다
|
||
1. TWLMenu++ 설정을 여세요
|
||
1. Switch to the `Misc settings` page
|
||
1. Turn on `Slot-1 microSD access`
|
||
1. `B` 버튼을 눌러 TWLMenu++ 설정을 종료하세요
|
||
- If you end up in the DS Classic Menu, press `B` again
|
||
|
||
#### R4(i) Ultra가 없는 경우
|
||
|
||
1. Create a file or folder called `primary` in `sd:/_nds/` (not the flashcard one), so that TWiLight Menu++ reads settings from the console's SD card after it starts your flashcard
|
||
1. Follow [this](installing-flashcard) guide starting from `Autobooting TWiLight Menu++`
|
||
1. Copy the `BOOT.NDS` file from `TWiLightMenu-Flashcard.7z` to your flashcard’s microSD card root
|
||
1. TWLMenu++ 설정을 여세요
|
||
1. Switch to the `Misc settings` page
|
||
1. Turn on `SCFG access in Slot-1` (Note that this option overrides `SD access in Slot-1`)
|
||
1. Set `Slot-1: Touch Mode` to `DSi mode`
|
||
1. Turn on `Auto-start Slot-1`
|
||
1. `B` 버튼을 눌러 TWLMenu++ 설정을 종료하세요
|
||
- If you end up in the DS Classic Menu, launch your flashcard
|
||
- Otherwise, restart TWiLight Menu++
|
||
|
||
#### Switching between SD and flashcard contents
|
||
- Press either `SELECT`+`Up` or `SELECT`+`Down` to switch between the SD and flashcard contents
|
||
- SELECT 메뉴가 활성화된 경우 이 메뉴에서도 선택할 수 있습니다
|
||
- If you use the 3DS theme, touch the Game Card/SD Card icon
|
||
- If you use the R4/GBC theme, press `L` button
|