mirror of
https://gist.github.com/a68d4b9ec16fed20e9d96c348ca499ee.git
synced 2025-06-18 18:25:32 -04:00
3.2 KiB
3.2 KiB
Dumping IS-NITRO-EMULATOR DS BIOS and Firmware
What you need
- A IS-NITRO-EMULATOR
- A Windows environment with the IS-NITRO-DEBUGGER software installed
- dsbf_dump v1.3.0
Section I - Loading the dumper ROM
- Rename the
dsbf_dump.ndsyou downloaded todsbf_dump.srl. - Connect the IS-NITRO-EMULATOR to Windows via USB and launch the IS-NITRO-DEBUGGER software.
- Go to
File>Load File.
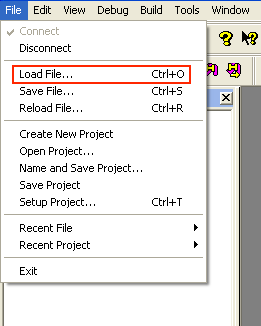
- Select
SRLunderOpen File, clickBrowseand choosedsbf_dump.srl. Tick all 3 boxes, then pressOK.

- Wait for the progress bars to complete. The DS should reboot into dsbf_dump.
Section II - Dumping debugger memory
- On the DS, press (A) on
Please press the A button to continue as a dev-kit.. - Wait till the screen shows
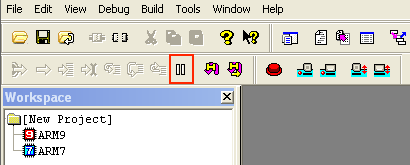
buffer at: 0x2xxxxxx. Note down the hexadecimal address. - Press the pause button in the debugger toolbar.
-
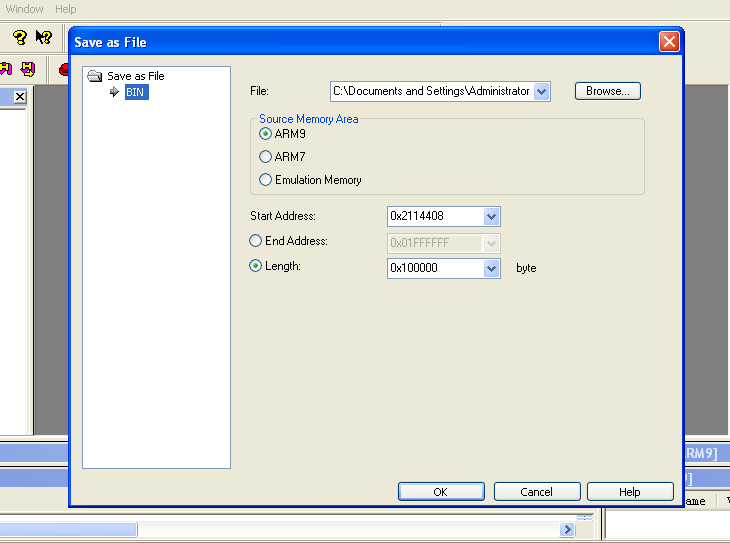
Go to
File>Save File.- Click
Browseand name the filefw.bin - Select
ARM9underSource Memory Area - In
Start Addresskey in the address you noted down in step 2 - For
Lengthkey in0x100000
Then press
OK. - Click
- Once the progress bar completes, press the soft run button in the debugger toolbar.

- On the DS, press (Start), and repeat steps 2 to 5, but name the file
bios7.bininstead. - On the DS, press (Start), and repeat steps 2 to 5, but name the file
bios9.bininstead. - On the DS, press (Start) twice to exit. You can press
OKto the message on the debugger sayingIt is going to recover NITRO processor.
Section III - Trimming dumps
Windows
The following instructions use the HxD hex editor, but other hex editors can be used as well.
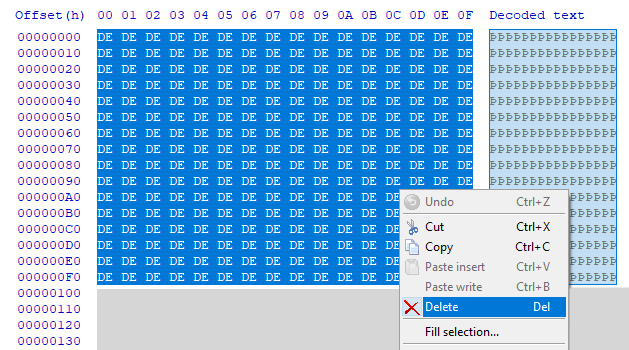
- Launch the HxD hex editor and open
fw.bin. - Select the first 0x100 bytes of
DE, right click >Delete. PressOKtoDo you want to proceed?.
-
Scroll down to 0x40000, right click >
Select block.- In
Start-offsetkey in40000 - In
End-offsetkey in100000 - Choose
hex
Then press
OK. - In
-
Right click the selected region >
Delete, and pressOKtoDo you want to proceed?. Save the file. -
Repeat steps 1 to 4 for
bios7.bin, but forStart-offsetkey in4000instead. -
Repeat steps 1 to 4 for
bios9.bin, but forStart-offsetkey in1000instead. -
Copy
fw.bin,bios7.binandbios9.binto a safe location on your computer.
Linux / macOS
- Open a terminal in the folder containing the 3
.binfiles, and run the following commands:
mkdir out/
dd if=fw.bin of=out/fw.bin bs=1 skip=0x100 count=0x40000
dd if=bios7.bin of=out/bios7.bin bs=1 skip=0x100 count=0x4000
dd if=bios9.bin of=out/bios9.bin bs=1 skip=0x100 count=0x1000
- Go inside the
outfolder, and copyfw.bin,bios7.binandbios9.binto a safe location on your computer.