mirror of
https://github.com/rvtr/wiki.git
synced 2025-10-31 06:31:13 -04:00

4.6 KiB
4.6 KiB
| lang | layout | section | category | title | long_title | description | tabs | |||||||
|---|---|---|---|---|---|---|---|---|---|---|---|---|---|---|
| id-ID | wiki | twilightmenu | installing | Pemasangan (3DS) | Pemasangan TWiLight Menu++ (3DS) | Cara memasang TWiLight Menu++ pada Nintendo 3DS |
|
Sebelumnya harus punya custom firmware di konsol 3DS, ikuti 3ds.hacks.guide untuk memasangnya {:.alert .alert-info}
{% capture tab-working-camera %}
- Buka FBI dan pilih
Remote Install, kemudianScan QR Code - Pindai kode QR berikut untuk memasang Universal-Updater versi terkini
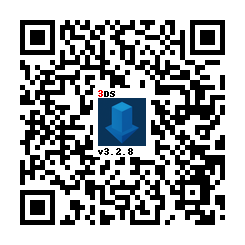
- Tutup FBI dan luncurkan Universal-Updater
- Jika tidak muncul di menu beranda, nyalakan ulang 3DS
- Cari TWiLight Menu++ di grid aplikasi, kamu bisa menggunakan tab ketiga pada sidebar jika kesulitan mencarinya
- Ikon seperti ini:

- Ikon seperti ini:
- Tekan A atau ketuk ikon unduh di sidebar dan pilih
TWiLight Menu++untuk memasangnya- Ini akan lumayan lama {% endcapture %} {% assign tab-working-camera = tab-working-camera | split: "////////" %}
{% capture tab-non-working-camera %}
- Unduh
Universal-Updater.ciayang terkini - Taruh berkas
Universal-Updater.ciadi mana pun di kartu SD - Luncurkan FBI di Nintendo 3DS
- Saat di FBI, masuk ke tempat ditaruhnya berkas
Universal-Updater.cia - Pilih berkas
Universal-Updater.ciadan tekan "Install & Delete" - Tutup FBI dan luncurkan Universal-Updater
- Jika tidak muncul di menu beranda, nyalakan ulang 3DS
- Cari TWiLight Menu++ di kisi (grid) aplikasi, gunakan tab ketiga pada papan sisi (sidebar) jika kesusahan mencari
- Ikon seperti ini:
- Ikon seperti ini:
- Tekan A atau ketuk ikon unduh di papan sisi (sidebar) dan pilih
TWiLight Menu++untuk memasangnya- Ini akan lumayan lama {% endcapture %} {% assign tab-non-working-camera = tab-non-working-camera | split: "////////" %}
{% capture tab-manual %}
- Unduh
TWiLightMenu-3DS.7zyang terkini - Ekstrak
TWiLightMenu-3DS.7z - Salin folder
_ndske root kartu SD - Salin berkas
BOOT.NDSke root kartu SD - Salin folder
romske root kartu SD - Copy the
.ciafile to your SD card root - On your 3DS, install the CIA with FBI {% endcapture %} {% assign tab-manual = tab-manual | split: "////////" %}
Pemasangan
{% assign tabs = tab-working-camera | concat: tab-non-working-camera | concat: tab-manual %} {% include tabs.html index=0 tabs=tabs %}
Accessing flashcard contents
A flashcard is something that goes in the game card slot, and contains a microSD card slot. If you do not have a flashcard, you are done with this guide. {:.alert .alert-warning}
If you have an R4(i) Ultra
- Follow this guide starting from
To run games using your flashcard firmware- You can safely ignore the warnings
- Open TWLMenu++ Settings
- Switch to the
Misc settingspage - Turn on
Slot-1 microSD access - Exit TWLMenu++ Settings by pressing
Bbutton- If you end up in the DS Classic Menu, press
Bagain
- If you end up in the DS Classic Menu, press
If you don't have an R4(i) Ultra
- Create a file called
primaryinsd:/_nds/(not the flashcard one), so that TWiLight Menu++ reads settings from the console's SD card after it starts your flashcard - Follow this guide starting from
Autobooting TWiLight Menu++ - Copy the
BOOT.NDSfile fromTWiLightMenu-Flashcard.7zto your flashcard’s microSD card root - Open TWLMenu++ Settings
- Switch to the
Misc settingspage - Turn on
SCFG access in Slot-1(Note that this option overridesSD access in Slot-1) - Set
Slot-1: Touch ModetoDSi mode - Turn on
Auto-start Slot-1 - Exit TWLMenu++ Settings by pressing
Bbutton- If you end up in the DS Classic Menu, launch your flashcard
- Otherwise, restart TWiLight Menu++
Switching between SD and flashcard contents
- Press either
SELECT+UporSELECT+Downto switch between the SD and flashcard contents- If the SELECT menu is enabled, you can do so there as well
- If you use the 3DS theme, touch the Game Card/SD Card icon
- If you use the R4/GBC theme, press
Lbutton